Making a pinhole projector is a simple and effective way to safely view a solar eclipse. Here's how you can make one:
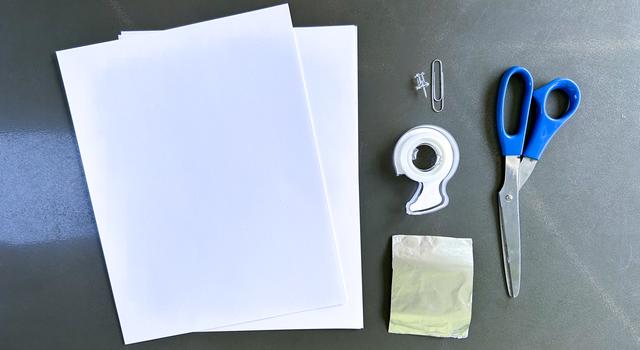
Materials Needed:
- Two sheets of stiff paper or cardboard
- Aluminum foil
- Tape
- Scissors
- Pin or needle
Instructions:
- Take one of the sheets of paper or cardboard and cut out a small square or rectangle from the center. This will be the base of your pinhole projector.
- Cover the square or rectangle hole with aluminum foil and secure it tightly with tape. Ensure that the foil is smooth and flat, with no wrinkles or creases.
- Use the pin or needle to poke a small hole in the center of the aluminum foil. This hole will act as the "pinhole" through which the sunlight will pass.
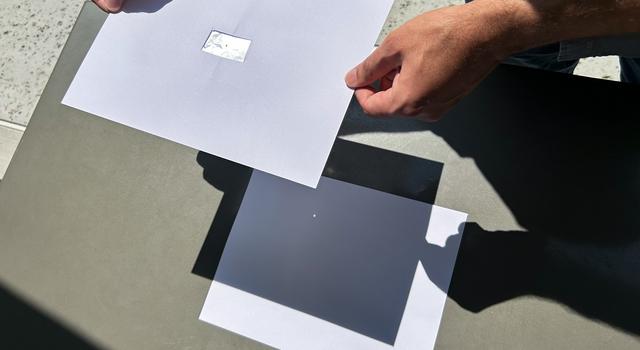
- Stand with your back to the sun and hold the sheet with the aluminum foil facing the sun. The sunlight will pass through the pinhole and project an image of the partially eclipsed sun onto the second sheet of paper or cardboard.
- Hold the second sheet of paper or cardboard a short distance away from the first sheet, allowing the projected image to come into focus. Adjust the distance until you have a clear and sharp image of the sun.
- To view the image safely, stand with your back to the sun and look at the second sheet of paper or cardboard. You will see a projected image of the sun, with the eclipse visible as a darkened area on the sun's surface.
Remember to never look directly at the sun without proper eye protection, even when using a pinhole projector. Enjoy the eclipse safely and marvel at the wonders of the universe!